
Best 5 Sided Bay Window Curtain Poles for UK Homes – Expert Guide
Introduction: Why Your Bay Window Deserves Better

Let me tell you something about bay windows – they’re both a blessing and a bit of a headache, aren’t they? You’ve got this gorgeous architectural feature flooding your living room with light, creating that perfect reading nook you’ve always dreamed of. But then comes the curtain situation. And if you’re living in one of those stunning Victorian or Edwardian homes dotting the streets of London, Manchester, Birmingham, or Leeds, you know exactly what I’m talking about.
I remember the first time I tried to hang curtains on a five-sided bay window. There I was, standing in my living room with a standard curtain pole, thinking, “How hard can this be?” Turns out, quite hard. That’s when I discovered that not all bay windows are created equal, and a five-sided bay needs a special kind of curtain pole – one that bends, flexes, and actually follows the window’s unique shape.
Here’s the thing: a proper 5 sided bay window curtain pole transforms your window from awkward to absolutely stunning. You’re not just hanging fabric; you’re creating an elegant frame that follows every angle of your bay window perfectly. And trust me, once you get it right, you’ll wonder why you ever struggled with those makeshift solutions.
In this guide, I’ll walk you through everything you need to know about choosing, installing, and styling the perfect curtain pole for your five-sided bay window. Whether you’re renovating your period property or simply replacing that tired old pole from the previous owners, we’ve got you covered.
Understanding Your 5 Sided Bay Window: The Basics
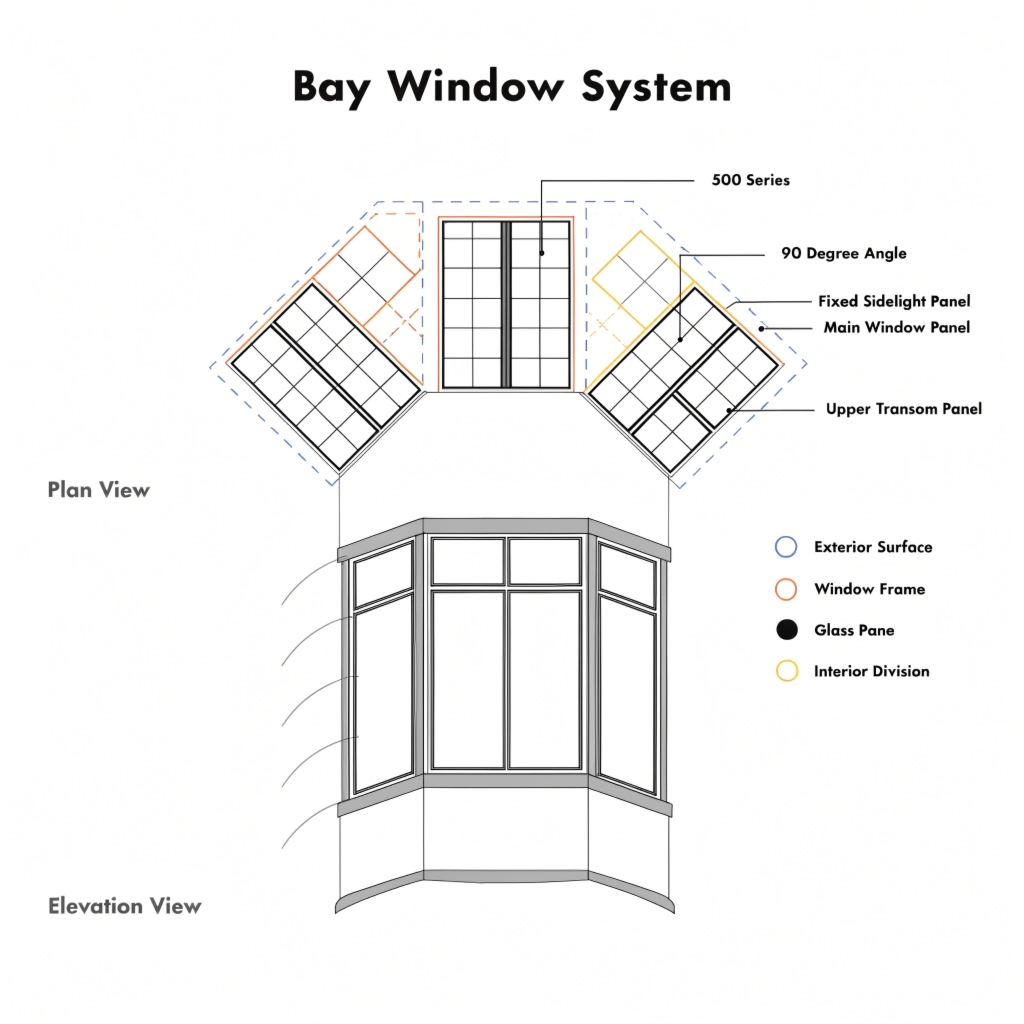
Before we dive into poles and installation, let’s talk about what makes a five-sided bay window special. Unlike the simpler three-sided or square bays, a five-sided bay has – you guessed it – five distinct angles. Typically, you’ll find a central panel flanked by two angled sides on each side, creating that beautiful, rounded appearance that’s so characteristic of Victorian and Edwardian architecture.
Why does this matter for curtain poles?
Well, each of those five sides needs to be addressed. You can’t just slap up a straight pole and call it a day (believe me, I tried). You need either:
- A flexible curtain pole that bends around all five sections
- A bay window curtain pole kit with angled connectors for each junction
- A custom-made pole tailored to your exact measurements
The goal? Creating a seamless curtain track that follows your window’s shape perfectly, allowing your curtains to glide smoothly and sit beautifully when drawn.
Top 5 Sided Bay Window Curtain Poles: Product Comparison
I’ve tested quite a few options over the years (some successful, some… less so). Here’s what actually works, with honest pros and cons from someone who’s been there.
| Product | Type | Price Range | Best For | Where to Buy |
|---|---|---|---|---|
|
Swish Deluxe Bay Pole |
Flexible metal with brackets |
£80-£120 |
Modern aesthetics, easy DIY |
|
|
Speedy County Bay Pole |
28mm metal with angled connectors |
£60-£95
|
Traditional homes, budget-friendly
|
Dunelm, Wayfair UK |
|
Silent Gliss Metropole |
Premium flexible system |
£150-£250 |
Luxury finish, heavy curtains |
John Lewis |
|
Rolls Neo Bay Kit |
35mm premium metal |
£120-£180 |
Designer finials, quality seekers |
|
|
Dunelm Essentials Bay |
Budget-friendly basic
|
£40-£65
|
Rental properties, temporary solutions |
Dunelm |
Which Should You Choose?
For most Victorian/Edwardian homeowners: The Swish Deluxe or Speedy County poles offer the sweet spot between quality and price. They’re sturdy enough for heavy curtains, look good with period features, and won’t break the bank.
If budget isn’t an issue: Silent Gliss is the Rolls Royce of curtain poles. Whisper-quiet glide, impeccable finish, and it’ll outlast your curtains by decades.
On a tight budget: The Dunelm Essentials range gets the job done. It won’t win design awards, but it’ll hold your curtains up reliably.
The Complete Buying Guide: What to Look for in a Curtain Pole for 5 Sided Bay Window
1. Measure Twice, Buy Once (Seriously)
This isn’t just a cliché – it’s gospel when dealing with bay windows. You need:
- Width of each section (all five of them)
- Angles between sections (grab a protractor if you need to)
- Projection needed (how far from the wall should the pole sit?)
Total width when the pole follows the bay’s curve
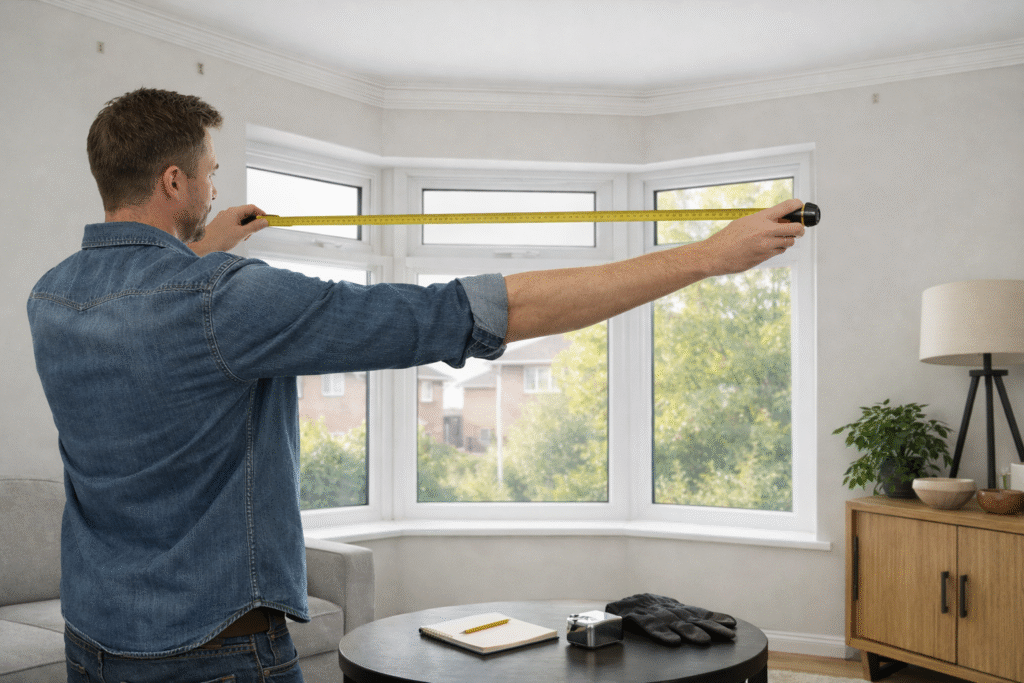
Pro tip: Add a photo of your window to your phone and keep it handy when shopping. Trust me, it helps when you’re standing in Dunelm trying to remember if your bay is 2.5 or 3 meters wide.
2. Material Matters
You’ve got three main options:
Metal poles (steel, aluminum, brass):
- Heavy-duty and sturdy
- Perfect for thick, lined curtains
- More expensive but longer-lasting
- Can support poles up to 35mm diameter
Plastic/composite poles:
- Lighter weight
- Budget-friendly
- Fine for lighter curtains
- Sometimes look a bit… cheap (sorry, but it’s true)
Wood effect:
- Classic look for period homes
- Actually usually metal with wood finish
- Can be pricey but gorgeous with the right décor
For a five-sided bay in a Victorian terrace, I’d lean toward metal every time. The angles put stress on the connectors, and you want something that’ll hold up.
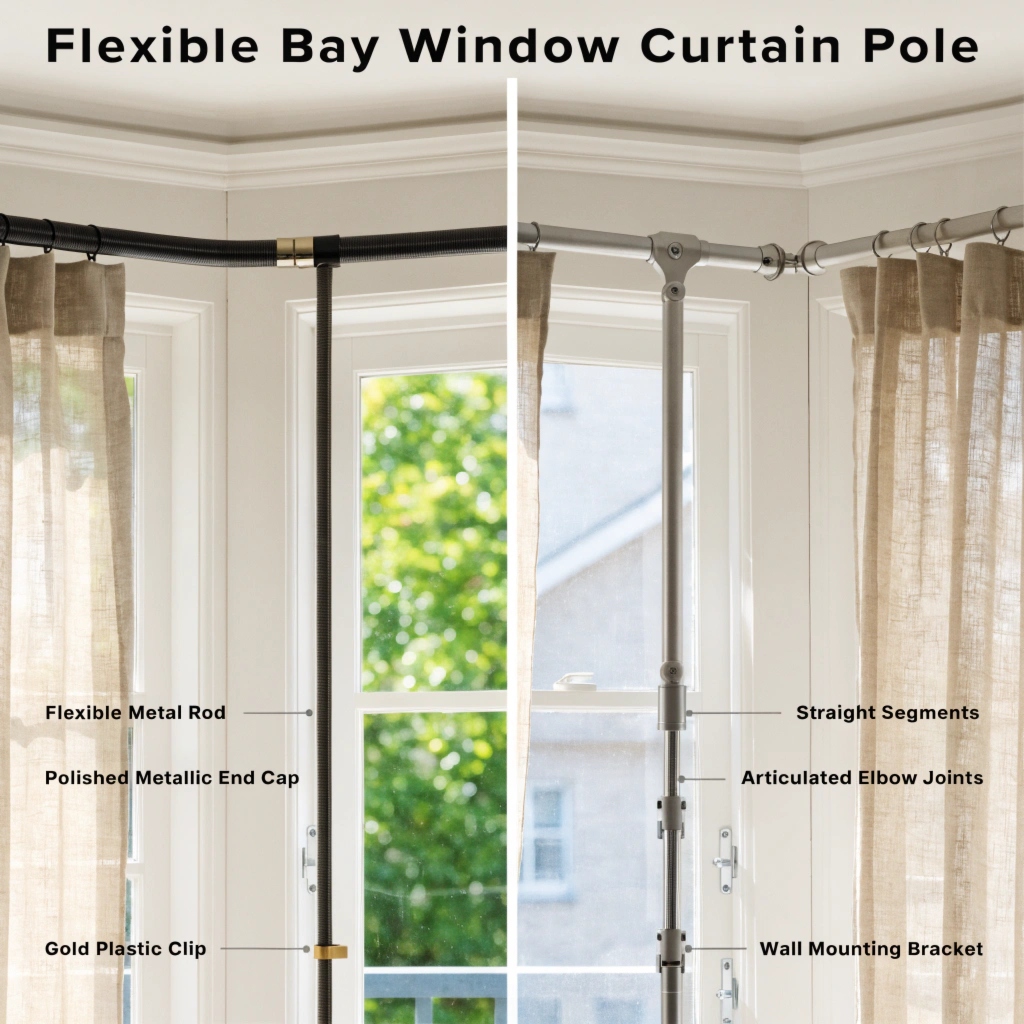
3. Flexible vs. Jointed: The Great Debate
Flexible poles bend smoothly around your bay. They’re:
- Easier to install (fewer parts)
- Create a continuous look
- Best for gentle curves
- Limited in how much weight they can hold
Jointed poles use angled connectors at each junction. They’re:
- Stronger for heavy curtains
- More traditional appearance
- Trickier to install (more brackets needed)
- Better for sharp angles
My take? If your five-sided bay has gentle curves, go flexible. Sharp angles? Jointed is your friend.
4. Diameter: Size Does Matter
Standard sizes are 19mm, 28mm, and 35mm.
- 19mm: Light curtains only (think voiles, sheers)
- 28mm: The Goldilocks size – works for most curtains
- 35mm: Heavy, lined, or interlined curtains
For a proper Victorian bay with thick curtains, don’t go below 28mm. Your curtains will thank you.
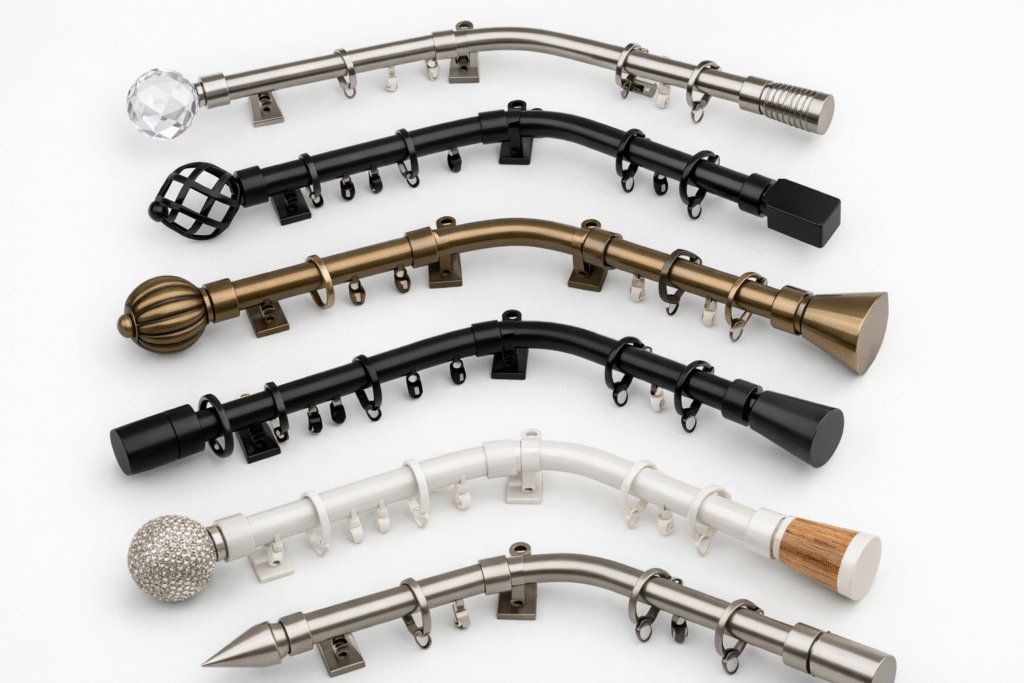
5. Finials: The Finishing Touch
Those decorative ends aren’t just for show. They:
- Stop your curtains sliding off
- Add character to your room
- Come in dozens of styles (balls, cones, acorns, scrolls)
Match them to your room’s style. Victorian home? Go ornate. Modern space? Keep them simple.
How to Fit a 5 Sided Bay Window Curtain Pole: Step-by-Step Guide
Right, let’s get down to brass tacks. You’ve bought your pole, you’ve got your tools ready, and you’re feeling brave. Here’s how to actually install the thing without losing your mind (or making holes in all the wrong places).
What You’ll Need:
- Your 5 sided bay window curtain pole kit
- Electric drill
- Masonry drill bits (if you’re drilling into brick)
- Spirit level (this is NON-NEGOTIABLE)
- Pencil
- Tape measure
- Screwdriver
- Wall plugs and screws (usually included)
- A helper (seriously, get someone to hold things)
- Cup of tea (optional but recommended)
Step 1: Plan Your Bracket Positions
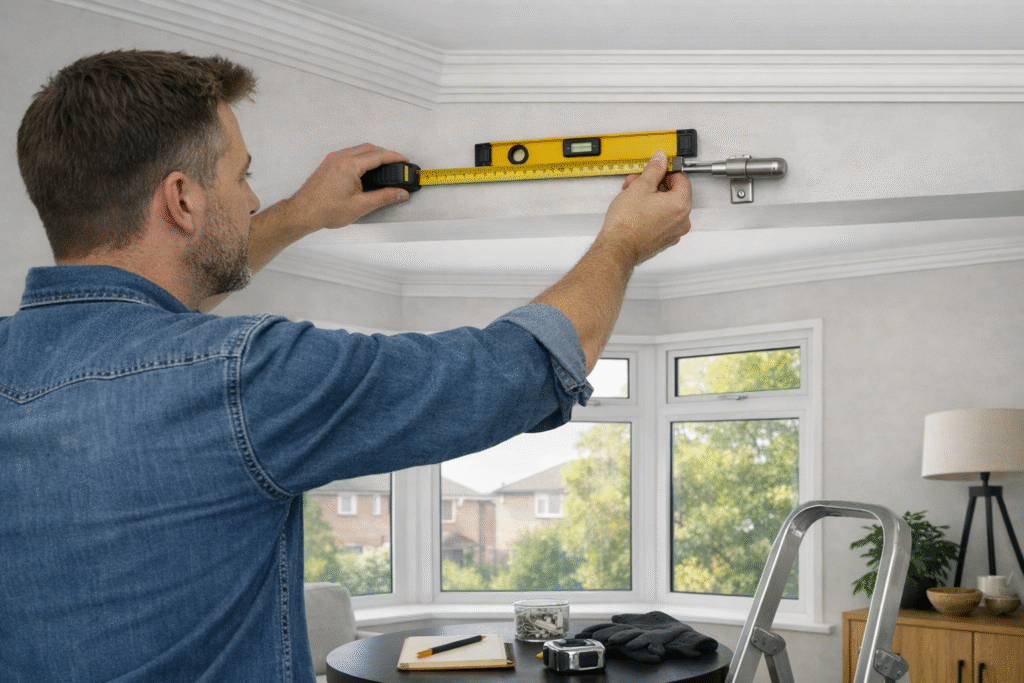
Before you drill a single hole, you need to figure out where every bracket goes. Here’s the deal:
- You need at least one bracket per section (that’s five minimum)
- Add extra brackets every 60-80cm for support
- Position the pole 10-15cm above the window frame
- Make sure it projects far enough that curtains clear the window sill
Top Tip: Use masking tape to mark bracket positions on the wall. Step back, check they look right, adjust before drilling. I learned this the hard way after drilling holes that were wonky as anything.
Step 2: Install the First Bracket
Start with the center section (the flat bit in the middle). Why? Because it’s your reference point for everything else.
- Hold the bracket where you want it
- Check it’s level (use that spirit level!)
- Mark screw holes with a pencil
- Drill pilot holes
- Insert wall plugs
- Screw bracket firmly into place
Don’t rush this bit. If your center bracket is off, everything else will be off too.
Step 3: Work Outwards Systematically
Once your center is solid, work your way out to one side, then the other:
- Install the angled brackets one at a time
- Keep checking levels as you go
- Make sure each bracket sits at the right angle
- Test-fit the pole sections as you install brackets
The angled sections are where people usually cock things up (myself included, first time around). The trick is getting the angle right so the pole sections connect smoothly without gaps or stress on the joints.
Step 4: Assemble the Pole (If Jointed)
For jointed poles with connectors:
- Connect each section with the angled joints
- Ensure connections are tight (but don’t over-tighten!)
- Slide rings onto each section before fitting
- Add finials to the end sections
For flexible poles, this step is much simpler – just thread your rings on and you’re sorted.
Step 5: Mount the Pole
This is where that helper comes in handy:
- Lift the entire pole assembly
- Slot it into the brackets
- Secure with the fixing screws or clips
- Check the pole is level across all sections
- Test the glide – rings should move smoothly
Common mistake: Forgetting to put the curtain rings on before mounting the pole. Don’t be that person. Been there, done that, had to take the whole thing down again.
Step 6: Final Adjustments
- Make sure all screws are tight
- Check the pole doesn’t sag anywhere
- Test the curtains glide smoothly
- Adjust bracket positions if needed (better now than later!)
How to Make a 5 Sided Bay Window Curtain Pole: The DIY Approach
Look, I get it. Sometimes you want to make something yourself, whether it’s for that perfect custom fit, the satisfaction of DIY, or because you’ve got an awkward size that off-the-shelf poles just won’t handle.
Can You Actually Make One?
Short answer: Yes, but it’s not for the faint-hearted.
Longer answer: Making a proper five-sided bay pole requires some serious DIY chops. You’re essentially creating a custom curved track with multiple angles, and everything needs to be precise.
If You’re Going the DIY Route:
Option 1: Flexible Conduit Method
This is the budget hack I’ve seen work:
- Buy metal conduit (electrical piping) from a builders’ merchant
- Get bendable connectors
- Cut to size for each section
- Create smooth bends at each angle
- Add brackets and finials
Pros: Cheap, customizable Cons: Can look a bit DIY (because it is), not ideal for heavy curtains
Option 2: Wood and Brackets
For the woodworking enthusiast:
- Use wooden doweling (28mm or 35mm)
- Cut precisely measured sections
- Create angled joints with dowel connectors
- Sand smooth
- Stain or paint to match your décor
Pros: Can look gorgeous, totally bespoke Cons: Time-consuming, needs proper tools, can be tricky at the angles
My Honest Opinion on DIY Bay Poles
Unless you’re a proper DIY wizard with serious woodworking skills, I’d invest in a ready-made kit. The price difference isn’t huge, and the hassle you’ll save is worth every penny.
That said, if you’ve got an unusual window size or you’re after a very specific look, DIY might be your only option. Just budget extra time (and patience).
5 Sided Bay Window Curtain Pole B&Q and Other Retailers
Let’s talk shops, because where you buy matters almost as much as what you buy.
B&Q
I’ll be honest – B&Q’s bay pole selection is… limited. They stock some basics, mostly flexible types, but don’t expect a huge range. Good for picking up brackets and fixing though.
What they’re good for: Hardware, extra brackets, measuring tools What they lack: Premium options, specialist fittings
Amazon UK Shop Amazon UK
Amazon is brilliant for:
- Massive selection (like, truly massive)
- Customer reviews (always read these!)
- Quick delivery (often next day)
- Competitive prices
Watch out for: Import listings (stick to UK sellers), quality can vary
John Lewis Shop John Lewis
The posh option, but genuinely worth it:
- Quality guaranteed
- Excellent customer service
- Good returns policy
- Knowledgeable staff (in-store)Expect to pay: 20-30% more than budget retailers, but you’re buying peace of mind
Dunelm Shop Dunelm
The sweet spot for most people:
- Decent quality at fair prices
- Good range of styles
- Helpful staff in stores
- Regular sales and offers
Best for: Mid-range budgets, want to see products in person
Wayfair UK Shop Wayfair UK
The online specialist:
- Huge choice
- Detailed specifications
- Regular discounts
- Free delivery on orders over £40
nce).
Downside: Can’t see products before buying, returns can be faffy
Common Problems and Solutions
Problem 1: Pole Sagging in the Middle
Why it happens: Not enough brackets, pole too thin for curtain weight
Fix: Add an extra bracket or two in the center section. If that doesn’t work, upgrade to a thicker pole.
Problem 2: Curtains Won’t Glide Smoothly
Why it happens: Brackets too tight, pole not level, cheap rings
Fix: Check all brackets are level. Slightly loosen bracket grips. Invest in better quality curtain rings (metal glides better than plastic).
Problem 3: Gaps at the Angled Joints
Why it happens: Incorrect angle on connectors, pole sections cut wrong
Fix: Adjust connector angles. You might need angled washers to fill gaps. In bad cases, you may need to remount brackets.
Problem 4: Pole Pulls Away from Wall
Why it happens: Heavy curtains, poor wall fixings, not enough brackets
Fix: Use longer screws and proper wall plugs. For plasterboard walls, use cavity fixings. Add more brackets for support.
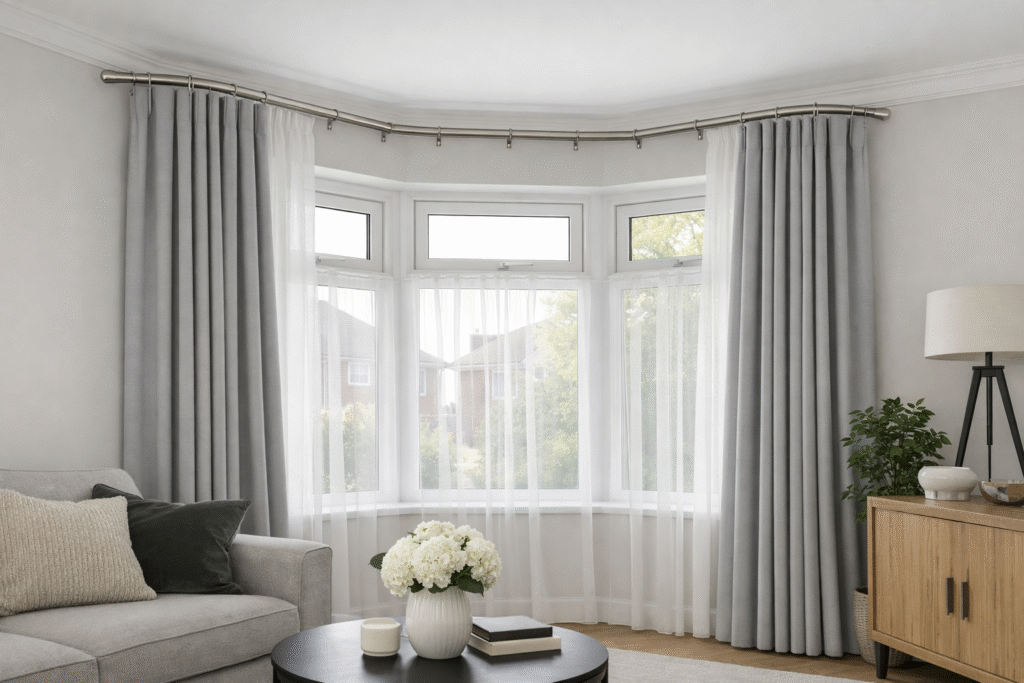
Styling Tips: Making Your Bay Window Look Amazing
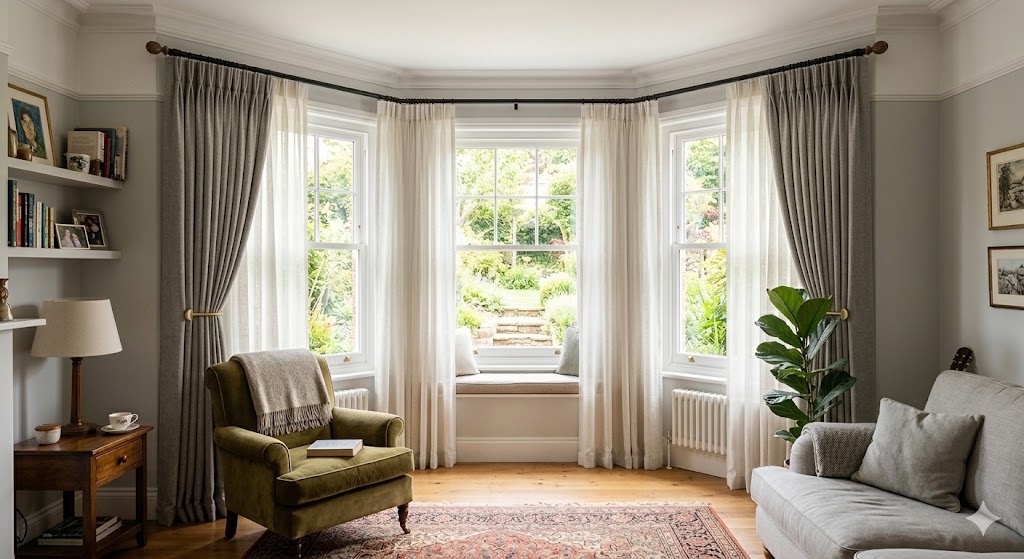
Curtain Choice Matters
- Heavy lined curtains: Need 28mm or 35mm poles with plenty of brackets
- Lighter fabrics: Can get away with 19mm flexible poles
- Layered look: Install two poles – one for sheers, one for curtains
The Perfect Length
Floor-length curtains should just kiss the floor or have a 1-2cm break. Too short looks odd, too long gets dirty.
Tie-Backs and Accessories
Position tie-backs at about two-thirds of the window height. This creates pleasing proportions and lets in maximum light.
Color Coordination
Your pole finish should complement (not necessarily match) your curtains:
- Brass/gold: Warm, traditional, Victorian homes
- Chrome/silver: Cool, contemporary, modern spaces
- Black: Dramatic, works everywhere
- White: Fresh, coastal, Scandi vibes
Frequently Asked Questions
Q: How much does a 5 sided bay window curtain pole cost?
A: Expect to pay £40-£250 depending on quality. Budget options start around £40-£65 (Dunelm Essentials range). Mid-range runs £80-£120 (Swish, Speedy brands). Premium poles (Silent Gliss, custom made) can cost £150-£250+. Don’t forget installation costs if you’re hiring someone – typically £80-£150 for a professional fitter.
Q: Can I install a bay window curtain pole 5 sided myself?
A: Absolutely, if you’re handy with a drill and have basic DIY skills. Most people successfully install their own poles using the steps I’ve outlined above. The trickiest bit is getting all five sections aligned properly and ensuring brackets are level. Give yourself a good afternoon, get a helper, and take your time. If you’re uncomfortable drilling into walls or working at height, hiring a handyperson for £80-£100 is money well spent.
Q: What’s the difference between flexible and jointed poles for 5 sided bays?
A: Flexible poles bend smoothly around all five sections in one continuous piece – easier to install, sleek look, but limited weight capacity. Jointed poles use angled connectors at each junction – stronger for heavy curtains, more traditional appearance, but more complex installation. For Victorian homes with thick curtains, jointed is usually better. For lighter curtains and gentler curves, flexible works brilliantly.
Q: How many brackets do I need for a 5 sided bay window?
A: Minimum five (one per section), but realistically you’ll want 7-9 brackets for proper support. The wider your bay, the more brackets you need. Add an extra bracket every 60-80cm. For a typical 3-meter bay, plan for 7-8 brackets. Skimping on brackets leads to sagging – not worth it!
Q: Will a standard curtain pole work on a 5 sided bay?
A: No, standard straight poles won’t work. You specifically need either a flexible bay pole or a jointed bay pole system designed to handle the angles. Trying to force a straight pole around a bay window ends in tears (and potentially broken poles). Invest in the right product from the start.
Final Thoughts: Getting It Right

Here’s what I’ve learned after wrestling with more bay window curtain poles than I care to count: the right pole transforms your entire room.
A proper 5 sided bay window curtain pole isn’t just functional – it’s the frame that shows off your gorgeous window, your carefully chosen curtains, and the character of your period home. Get it right, and every time you draw those curtains, you’ll feel a little spark of satisfaction.
Yes, it costs more than a straight pole. Yes, installation is a bit fussier. But you live with this feature every single day. It’s worth doing properly.
My top recommendations:
- Best overall: Swish Deluxe Bay Pole from Amazon UK or John Lewis
- Best budget: Dunelm Essentials Bay from Dunelm
- Best luxury: Silent Gliss Metropole from John Lewis
Measure carefully, don’t rush the installation, and when in doubt, add an extra bracket. Your curtains (and your sanity) will thank you.
Now go make that bay window sing!